Desserts

Chocolate Orange Ricotta Cookies

I’m sorry if I’ve overloaded you with desserts this season, but the good thing is mine have been healthy-ish. :) This recipe comes together in under 30 minutes, but has the flavors of you baking all day long! I love when I get to impress without exhausting myself! Yes, Please!!!

Chocolate Life Shake is the key — it blends perfectly with ricotta cheese to create a creamy, chocolatey foundation for these cookies, with a tablespoon of orange zest adding a bright, light flavor to each mouthful.

Chocolate Orange Ricotta Cookies

Servings: 10 Servings

Ingredients

Parchment paper 

½ cup almond flour

4 scoops chocolate Life Shake

1 tsp. baking powder

1 cup part-skim ricotta cheese

¼ cup unsweetened almond milk (or unsweetened oat milk) 

1 large egg

1 tsp. pure vanilla extract 

3 Tbsp. semi-sweet chocolate chips 

1 tsp. coconut oil

1 Tbsp. finely grated orange peel (orange zest)

Instructions

1. Preheat oven to 350° F. Line a large baking sheet with parchment paper; set aside.

2. Add almond flour, Life Shake, and baking powder to a small mixing bowl. Stir until mixed; set aside.

3. Add ricotta, almond milk, egg, and extract to a medium mixing bowl; stir until combined.

4. Add dry mixture to wet mixture; stir until combined. Shape into 10 equal balls, approximately 2 Tbsp. each; arrange on a prepared sheet. Gently flatten each ball by pressing with the back of a spoon.

5. Bake for 12 minutes. Set aside on a baking sheet for 1 minute; transfer to a cooling rack.

6. While cookies are still hot, melt chocolate chips and oil in a small microwave-safe bowl for 30 seconds; stir. Repeat, until chocolate is melted. Drizzle chocolate evenly onto cookies. Sprinkle it with orange peel.

7. Store cookies in an airtight container at room temperature for up to four days or freeze for up to 1 month.

Candy Corn Parfait

Where are my candy corn lovers at? This is a love/hate treat, but this trick puts a healthy spin on the COLORS of candy corn, without all the artificial sugar. Here’s the Candy Corn Parfait - a perfect dessert to serve up on Halloween.

Ingredients

  • 1 cup coconut cream, unsweetened (chill in fridge overnight or in the freezer for 1 hour)

  • 1 tbsp pure maple syrup

  • 1 pinch sea salt

  • ½ tsp pure vanilla extract

  • 20 oz canned pineapple chunks in juice, drained

  • 2 cups canned manadarin oranges, drained

  • 8 pieces candy corn

Instructions

  1. Remove all liquid from coconut cream.

  2. Place coconut cream, maple syrup, salt, and extract in a large mixing bowl; beat with a mixer until stiff peaks form. Set aside.

  3. Spoon pineapple evenly into the bottom of 8 clear glasses; then, arrange the mandarin oranges evenly on top.

  4. Top each glass with a dollop of whipped coconut cream + a piece of candy corn and serve! 

This recipe makes 8 servings.

Pumpkin Spice Latte Energy Balls

Try this delicious swap for a tasty seasonal  treat for after school snacks, sporting events, or as breakfast with a side of plain greek yogurt flavored with cinnamon and vanilla. My entire family loved these Pumpkin Spice Latte Energy Balls and I love that they’re all-natural, with none of the mystery ingredients packed into store bought pumpkin treats! That’s not good for any of us!

Ingredients

  • 1 cup all-natural smooth almond butter

  • ¼ cup honey

  • ¾ cup dry rolled oats

  • ½ packet of Cafe Latte life shake

  • ½ packet of Pumpkin Spice life shake (don’t have it? Use a full scoop of Cafe Latte + 1 tsp. Pumpkin spice mix)

  • ½ cup sliced almonds

Instructions

  1. Combine almond butter, honey, oats, life shake, and almonds in a medium bowl; mix well with clean hands or a rubber spatula.

  2. Shape mixture into 24 small balls; place in an airtight container. 

  3. Put in the fridge for at least 1 hour before serving.

  4. Eat immediately or store in an airtight container in the fridge for up to 5 days.

This recipe makes 12 servings (2 energy balls per serving).

High Protein Healthy Recess’s Cup

This is my most requested recipe of August. It's no surprise when 2 of the 4 ingredients are peanut butter and chocolate. That is never wrong! These are also Gluten Free, Dairy Free (depending on the Chocolate Chips you use), and Nut Free (use Sunflower Butter if this is a requirement)! This is very allergy friendly so it's been a hit with 100% that have tried it! The original recipe is HERE.

.

But I re-vamped this to include more protein and it was just as much a hit!! TRY THIS OUT!

New ingredient list (directions are the same):

1 cup quick oats (don’t use old fashioned)

2 scoops Life Protein (adds 20g protein) can be chocolate or vanilla, but I’ve always used vanilla

2 TBSP Pumpkin Seeds (any seeds are fine)

1 cup Nut Butter of choice (I used ½ almond butter, ½ peanut butter because that’s what I had on hand)

¼ cup honey

2 TBSP pure maple syrup (NO LITE syrup here, if you don't have PURE maple syrup, use extra honey or agave instead)

½ cup Chocolate chips of choice (choose DF if that's your goal)

Enjoy and let me know if you make these! If you have any questions, post them below.

You can make these “bars” or “balls”. Now that school is back in session I am rolling balls more so I can take them to the bus stop and they can eat on the way to sport a little quicker.

Unicorn Bark

If you’re someone who believes that the magic of unicorns exists, then you’re my people 🦄 This recipe recreates the magic of a unicorn without any mystery - you probably have most of the ingredients in your kitchen already!

Unicorn Bark looks decadent and delicious, but is made from protein powder, yogurt, and fresh fruit! A win, win for you and the whole family 🙌

Ingredients

Parchment paper

2¼ cups reduced-fat (2%) plain yogurt, divided use

6 scoops vanilla Life Shake, divided use

4½ tsp. honey, divided use

½ cup medium strawberries, chopped

½ cup fresh blueberries

½ cup chopped mango or pineapple

¼ cup + 2 Tbsp. unsweetened shredded coconut


Instructions

Line 13 x 9-inch pan with parchment paper. Set aside.

Place ¾ cup yogurt, 2 scoops Life Shake, 1½ tsp. honey, and strawberries in a blender; cover; blend until smooth. Place in a medium bowl. Set aside

Place ¾ cup yogurt, 2 scoops Life Shake, 1½ tsp. honey, and blueberries in a blender; cover; blend until smooth. Place in a medium bowl. Set aside

Place remaining ¾ cup yogurt, remaining 2 scoops Life Shake, remaining 1½ tsp. honey, and mango in a blender; cover; blend until smooth. Place in a medium bowl. Set aside.

Place large dollops of strawberry mixture randomly around the prepared baking sheet. Repeat with blueberry and mango mixtures, making sure dollops are touching. Gently swirl through yogurt mixtures with a knife in a circular motion to create marbling. Sprinkle top with coconut. 

Cover with plastic wrap. Freeze for two hours, or until firm, then cut (or break) into bite-sized pieces. Serve immediately, or freeze in an airtight container for up to five days until ready to eat.

Servings: 6

Peanut butter ice cream

I am wrapping up our Sweet Treat series with the sweetest, summer treat of them all - ice cream! This peanut butter ice cream is made from all-natural peanut butter, unsweetened almond milk, and chocolate Life Shake. The gluten-free, mini cookies are sweetened with just two tablespoons of maple syrup and can be paired with any ice cream you like!

For today, though, we’re keeping things peanut buttery and delicious 😋

Ingredients

Ice Cream

3 Tbsp. unsweetened almond milk

1 large banana, frozen, cut into chunks

2 Tbsp. all-natural peanut butter

2 scoops chocolate Life Shake


Cookies

1 cup almond flour (sift after measuring)

1 dash sea salt or Himalayan salt

1 dash baking soda

2 Tbsp. pure maple syrup

1 Tbsp. extra virgin organic coconut oil, melted

1 tsp. pure vanilla extract

2 tsp. unsweetened almond milk

Parchment paper


Instructions

For Ice Cream

Place almond milk, banana, peanut butter, and Life Shake in a food processor (or blender). Process until smooth. Immediately freeze and store in a tightly covered container for up to five days until ready to eat.


For Cookies

Preheat the oven to 325° F. Lightly coat a large baking sheet with spray. Set aside. 


Combine almond flour, salt, and baking soda in a medium bowl; mix well. Set aside.


Combine maple syrup, oil, and extract in a small bowl; mix well. 


Add maple syrup mixture to almond flour mixture. Add almond milk, mixing to break up clumps of dough. Form dough into a ball with clean hands. Place on parchment paper. Roll into a 7-inch long log. Freeze for 50 to 60 minutes, or until firm.


Cut the log into twelve slices. Spread slices out on a prepared baking sheet. Bake for 8 to 10 minutes, or until set. Cool for 10 minutes on a baking sheet. Loosen with metal spatula, remove from baking sheet and cool completely on a wire rack (or on parchment paper).


For Ice Cream Sandwiches

Place 2 Tbsp. ice cream on one cookie. Top with a second cookie. Repeat with remaining cookies. Freeze for one hour; serve immediately.


Servings: 6

No-Bake S’mores Bars!

For me, the only thing sweeter than summertime is summertime + a sweet treat in hand! I pulled out a few of my favorite sweet recipes to try this month, and I think I did a pretty fabulous job, if I do say so myself! 🤤

First up,

No-Bake S’mores Bars!

Ingredients

2 whole-wheat graham crackers (1 cracker sheet each), broken into large pieces

1 large ripe banana, mashed

½ cup all-natural almond butter

2 Tbsp. unsweetened cocoa powder

8 scoops Life Shake chocolate (divided use)

¾ cup part-skim ricotta cheese

2 scoops vanilla Life Shake

2 - 3 drops marshmallow flavor (optional, available at specialty baking stores)

3 Tbsp. extra-virgin organic coconut oil melted


Instructions

Place graham crackers in a food processor (or blender); process continuously until crackers are crushed into fine crumbs. Set aside.

Line an 8 x 8-inch pan with plastic wrap (or aluminum foil). Evenly sprinkle ⅓ of graham cracker crumbs in the bottom of the pan. Set aside.

Combine banana, almond butter, cocoa powder, 4 scoops chocolate Life Shake, and ⅓ of graham cracker crumbs in a medium bowl; mix well with clean hands or a rubber spatula.

Press chocolate mixture into the prepared pan. Cover with plastic wrap and press down to flatten into a pan. Refrigerate for 1 hour to set.

Place cheese, 2 scoops vanilla Life Shake, and marshmallow flavor in a food processor (or blender); process until smooth and well blended.

Evenly spread cheese mixture over chocolate mixture. Set aside.

Combine remaining 4 scoops chocolate Life Shake and oil in a small bowl; mix until smooth.

Evenly spread mixture over cheese mixture. Sprinkle top with remaining ⅓ of graham cracker crumbs. Lightly press graham cracker crumbs into the top. Refrigerate for 1 hour, or until set. Then, cut into twelve bars and serve! Enjoy immediately, or store in an airtight container in the refrigerator for up to three days.

Servings: 12

Banana Fudge Baked Oatmeal

Last week I talked about using our pre-workout Energize in a bite-size sweet treat! Talk about mixing it up 😝 Today, we’re going to do it again by remixing our post-workout Recover supplement into another incredible breakfast idea!

Banana Fudge Baked Oatmeal

Servings: 4

INGREDIENTS

1¼ cups dry rolled oats

1 large ripe banana, halved

1 cup unsweetened almond milk

2 tsp. pure maple syrup

1 tsp. baking powder

1 tsp. pure vanilla extract

½ tsp. ground cinnamon

½ tsp. sea salt (or Himalayan salt)

4 scoops Beachbody Performance Chocolate Recover

2 cups water


INSTRUCTIONS

1. Preheat oven to 400° F.

2. Lightly coat a loaf pan with spray; set aside.

3. Add oats, banana, almond milk, maple syrup, baking powder, extract, cinnamon, and salt to a blender; cover. Blend until combined.

4. Pour oat mixture into the prepared pan. Bake for 25 minutes.

5. While the oats bake, add Recover and water to a small mixing bowl; whisk to combine.

6. When the oats finish baking, slice into 4 portions. Top each with ¼ Recover mixture. Serve warm.


Portion Fix Containers: ½ yellow, ½ purple, 1 red, 1 tsp.

2B Mindset Plate It!: A great breakfast idea!


Cookie Dough Bites

I have one more mini recipe for you to enjoy! This one brings the deliciousness and childhood joy of taking a spoon to some cookie dough, without any unwanted judgment 😆 There’s a secret ingredient in there that I’m not sure you would guess, and I can’t wait to taste test to see if this one is too good to be true!

Cookie Dough Bites

Servings: 4 (3 bites each)

INGREDIENTS:

1 (15-oz.) can chickpeas (garbanzo beans), drained, rinsed

¼ cup peanut butter powder

3 Tbsp. dry rolled oats

2 Tbsp. unsweetened almond milk

2 tsp. pure vanilla extract

1 to 2 tsp. liquid monk fruit sweetener (or 1 to 2 packets powdered stevia)

¼ tsp. ground cinnamon

¼ tsp. sea salt (or Himalayan salt)

3 Tbsp. cacao nibs


INSTRUCTIONS:

1. Add chickpeas, peanut butter powder, oats, almond milk, extract, sweetener, cinnamon, and salt to a food processor; blend until smooth, scraping down sides as needed.

2. Transfer to a small mixing bowl. Add cacao nibs; stir to combine.

3. Roll into 12 balls, approx. 1½ inches each. Enjoy immediately, or store refrigerated in an airtight container for up to 4 days.


Lemon Raspberry Froyo Bites

Did you hear that there is a new, energy punch flavor launching this summer?! If you’ve been around here for more than a day, you know that Energize is my must-have supplement all year round. It gives me the perfect pre-workout boost, afternoon surge, or cooldown drink before I have to super focus on any task. It’s made from all-natural ingredients and green tea extract - so the caffeine + sugar doesn’t give you a crazy crash!

In honor of our newest flavor coming soon, I wanted to share a sweet, refreshing recipe to use the Energize you have at home, OR entice you to try your own.


Lemon Raspberry Froyo Bites

Servings: 10 (2 bites each)

INGREDIENTS

1 cup reduced-fat (2%) plain Greek yogurt 

2 cups frozen raspberries 

1 scoop Lemon Energize

2 Tbsp. finely grated lemon peel (lemon zest) 

INSTRUCTIONS

1. Prepare twenty muffin cups by lining with muffin papers. Lightly coat with spray, if desired. Set aside. 

2. Place yogurt, raspberries, Energize, and lemon peel in blender; cover. Blend until smooth. 

3. Fill each muffin cup to just below the rim with yogurt mixture (approx. 2 to 3 Tbsp.). Freeze for 2 to 4 hours, or until solid. Enjoy!

Portion Fix Containers: ½ red, ½ purple, 1 tsp
2B Mindset Plate It!: A perfect occasional snack - remember to track it!


Chocolate Cherry Froyo Cup

We are mixing things up each week to get some new ideas on preparing our favorite supplements! I love that our supplements can be added to water and are great on the go, but also LOVE the creativity these recipes bring. Here’s a fun way to use your chocolate superfoods as things heat up outside!

Chocolate Cherry Froyo Cup

Servings: 12

INGREDIENTS

¾ cup raw cashews

¾ cup pitted dates

¼ tsp. sea salt (or Himalayan salt)

2 cups reduced fat (2%) plain Greek yogurt

¼ cup raw honey

1 tsp. pure vanilla extract

1 scoop Chocolate Shakeology

1 cup fresh (or unsweetened frozen) cherries, pitted

INSTRUCTIONS

1. Prepare twelve muffin cups by lining with muffin papers. Lightly coat with spray, if desired. Set aside.

2. Place cashews, dates, and salt in a food processor; pulse until a fine crumb forms.

3. Divide cashew mixture evenly (approx. 1 Tbsp. + 1 1⁄2 tsp.) into the bottom of each muffin cup. Pack firmly. Set aside.

4. Clean food processor.

5. Combine yogurt, honey, extract, and Shakeology in food processor; process until well mixed.

6. Add cherries; pulse until cherries are coarsely chopped.

7. Fill each muffin cup to ¼-inch below the rim with cherry mixture (approx. 2 to 3 Tbsp.). Freeze for 4 to 6 hours, or until solid. Enjoy!

Cannoli Bites

Cookouts and pool parties are right around the corner, so I wanted to share some recipes that are easy to make and feed a crowd! These Cannoli Bites are perfect - and you probably won’t believe me when I say they are meal plan approved!

Cannoli Bites

Servings: 24 (1 bite each)

INGREDIENTS:

FOR DOUGH:

2 cups gluten-free all-purpose flour

1 tsp. xanthan gum

¼ tsp. sea salt (or Himalayan salt)

2 Tbsp. unsalted organic grass-fed butter, chilled, cubed

1 large egg yolk

½ cup white wine

FOR FILLING:

2¼ cups part-skim ricotta cheese

¼ cup + 2 Tbsp. powdered sugar

¼ cup + 2 Tbsp. semisweet mini chocolate chips

INSTRUCTIONS:

1. Preheat oven to 400° F.

2. Lightly coat a mini-muffin pan with spray; set aside.

3. To make dough, add flour, xanthan gum, and salt to a food processor; pulse to combine.

4. Add butter; pulse until broken down to pea-sized pieces. Add yolk and wine; pulse until dough forms.

5. Turn dough out onto your work surface; knead for 7 to 8 minutes, or until smooth. Flatten into a ½-inch-thick disk; wrap in plastic wrap. Refrigerate for 30 minutes.

6. To make filling, add ricotta, sugar, and chocolate chips to a medium bowl; mix well.

7. Add ricotta mixture to a resealable plastic bag; refrigerate until ready to use.

8. Unwrap dough; lightly dust with flour. Roll out to 1⁄8-inch thickness; cut into rounds with a 2½-inch cookie cutter. Re-form scraps into a ball; roll out ball. Cut into rounds until all dough is used up.

9. Press dough rounds into wells of muffin pan, molding them evenly up the sides of each cup, flattening the areas where they fold and overlap.

10. Lightly coat the top of the dough with spray; bake for 10 to 12 minutes, or until crisp and golden brown.

11. Transfer to rack to cool completely.

12. Once shells have cooled completely, remove ricotta mixture from fridge and snip one corner off of plastic bag; pipe approximately 2 Tbsp. mixture into each cup. Enjoy!

Portion Fix Containers: 1 yellow, 1 tsp.
2B Mindset Plate It!: A great occasional treat - be sure to track it

Salted Chocolate Maple Pecan Bars

This layered chocolate bar recipe hits all the right notes with a cookie-like crust, gooey chocolate interior, and crunchy nuts on top. It looks like a fancy store-bought chocolate treat, but it’s actually pretty simple to make!

These homemade bars are the perfect pick-me-up for that afternoon slump — skip the junk food and nibble on these salty-sweet, chocolatey, crunchy bars instead.

Salted Chocolate Maple Pecan Bars
Servings 9 servings

Ingredients

FOR CRUST:

  • ½ cup almond flour

  • ¼ cup raw pecans

  • 2 dates, pitted

  • 1 Tbsp. extra-virgin coconut oil

  • ⅛ tsp. sea salt (or Himalayan salt)

FOR CHOCOLATE LAYER:

  • ¼ cup all-natural almond butter

  • ¼ cup pure maple syrup

  • 2 Tbsp. water

  • 1 scoop Chocolate Shakeology

FOR TOPPING:

  • 2 Tbsp. chopped unsalted pecans

  • 1 Tbsp. semi-sweet chocolate chips

  • ¼ tsp. extra-virgin coconut oil, melted


Instructions

  1. To make the crust, place almond flour, pecans, dates, oil, and salt in a food processor; process continuously until pecans are crushed into fine crumbs. Set aside.

  2. Line an 8 x 8-inch (20 x 20-cm) baking dish with parchment paper. Using clean hands (or a rubber spatula) press the crust mixture into the dish to form an even layer. Set aside.

  3. To make the chocolate layer, combine almond butter, maple syrup, water, and Shakeology in a medium bowl; mix well.

  4. Press chocolate mixture on top of crust to form chocolate layer.

  5. Gently press chopped pecans into a chocolate layer.

  6. Place chocolate chips in a small bowl; microwave on high for 20 seconds. Stir; microwave on high for an additional 20 seconds. Stir. Repeat until chocolate is evenly melted (about three times). Add oil; mix well.

  7. Using a fork, drizzle chocolate over the prepared pan. Refrigerate for 1 hour before serving. Refrigerate in an airtight container for up to 1 day.

Container Equivalents: 1 Yellow, ½ Blue, 1½ tsp.
2B Mindset Plate It! Enjoy as an occasional treat. Be sure to track it.

Chocolate Shakeology Cake Pops - Happy Valentine’s Day!

This chocolate cake pop recipe couldn’t be easier or more delicious, so grab your popsicle sticks and start not baking. Yup, that’s right! Turn your ovens off and turn the delicious up with this super quick, super fun, healthy dessert!

Cake Pop Pro Tips:

🧁 If you don’t have lollipop or cake pop sticks, you can use popsicle sticks, toothpicks, or make cake balls — no sticks required!

🧁 To decorate cake pops, immediately after dipping in chocolate dip them in finely chopped nuts, graham cracker crumbs, finely chopped coconut, or rainbow sprinkles!

🧁 Make an easy, DIY cake pop stand by poking small holes into the lid of a small cardboard box.

Chocolate Shakeology Cake Pops

Servings 6 servings, 1 pop each

Ingredients

  • 2 scoops Chocolate Shakeology

  • 4 pitted dates

  • ¼ cup almond flour

  • ¼ cup unsweetened almond milk

  • 6 lollipop sticks (or alternative)

  • ¼ cup semisweet chocolate chips

  • 2 tsp. coconut oil

Instructions

  1. Combine Shakeology, dates, almond flour, and almond milk in a food processor; cover. Pulse until fine crumbs form, scraping down sides as needed.

  2. Shape mixture into six equal balls; insert a lollipop stick into the center of each, pressing the ball firmly around the stick. Set aside.

  3. Add chocolate chips and oil to a small microwave-safe bowl; microwave on high for 30 seconds. Stir, then microwave 30 seconds more if needed.

  4. Dip each cake ball into chocolate mixture to coat. Place into a cake pop stand (see tips above) or arrange on a plate lined with parchment paper; refrigerate until chocolate hardens, about 15 minutes. 

  5. Transfer to an airtight container and refrigerate for up to 1 day.

Container Equivalents: 1 Yellow, 2 tsp.
2B Mindset Plate It! Enjoy as an occasional treat. Be sure to track it!

Love Your Food

As I prepare for our new gut health + low-impact movement programs coming next month, I started reflecting on the foods that my body loves. Yes, the first things that come to mind are cakes and cookies and greasy, fast food cravings that I THINK my body loves. But do those foods make me feel like I love myself? Not. At. All. 

Foods that my body loves are WHOLE. They are clean and fresh and provide fuel and energy to my ever-changing day. I did some research (aka opened up my recipe library 😍) and found recipes to support this new love of food and eating to love my body.

Open up the free guide below and let me know which one you’re excited to try! My mouth is watering!


Click image to get recipes!

Dark Chocolate Superfood Bites

If you’re doing last-minute things today, like us, we want to give you a recipe that comes together easily, will “Wow!” a crowd, and is meal plan approved!

These Dark Chocolate Superfood Bites are bright and cheery! First, pick out toppings that you like. Look for nuts, seeds, and dried fruit that doesn’t have added sugar (we love the red and greens of cranberries and pistachios!) Hit up the bulk section to find ingredients. Since you don’t need much of each ingredient, you’ll save money and you might also be able to choose from a wider variety of toppings.

For this particular recipe, we used goldenberries, goji berries, almonds, pepitas (pumpkin seeds), almonds, Himalayan sea salt, and cranberries, but you can swap in and out what you like!

Servings 24 servings

INGREDIENTS
8 oz. dark chocolate, chopped into small pieces

12 Tbsp. raw pistachio pieces

12 Tbsp. pumpkin seeds (pepitas)

12 Tbsp. unsweetened dried cranberries

1 tsp. coarse sea salt (or Himalayan salt) (optional)

INSTRUCTIONS
Line a large baking sheet with parchment paper. Set aside.

Place chocolate in a microwave-safe glass measuring cup. Microwave for 60 seconds on 50%; stir. Microwave for another 30 seconds on 50%; stir until chocolate is completely melted. If needed, microwave for an additional 30 seconds on 50%. Do not overcook. Chocolate will melt as you stir it.

Use a spoon to make twenty-four small rounds of chocolate onto the parchment paper.

Working while chocolate is still warm, sprinkle chocolate rounds evenly with nuts, pumpkin seeds, cranberries, and salt (if desired).

Let the chocolate set at room temperature, or put the bites in the refrigerator to speed things up.

Container Equivalents: ½ Yellow, ½ Blue, ½ Orange
2B Mindset Plate It! Enjoy these as an occasional treat. Be sure to track it.

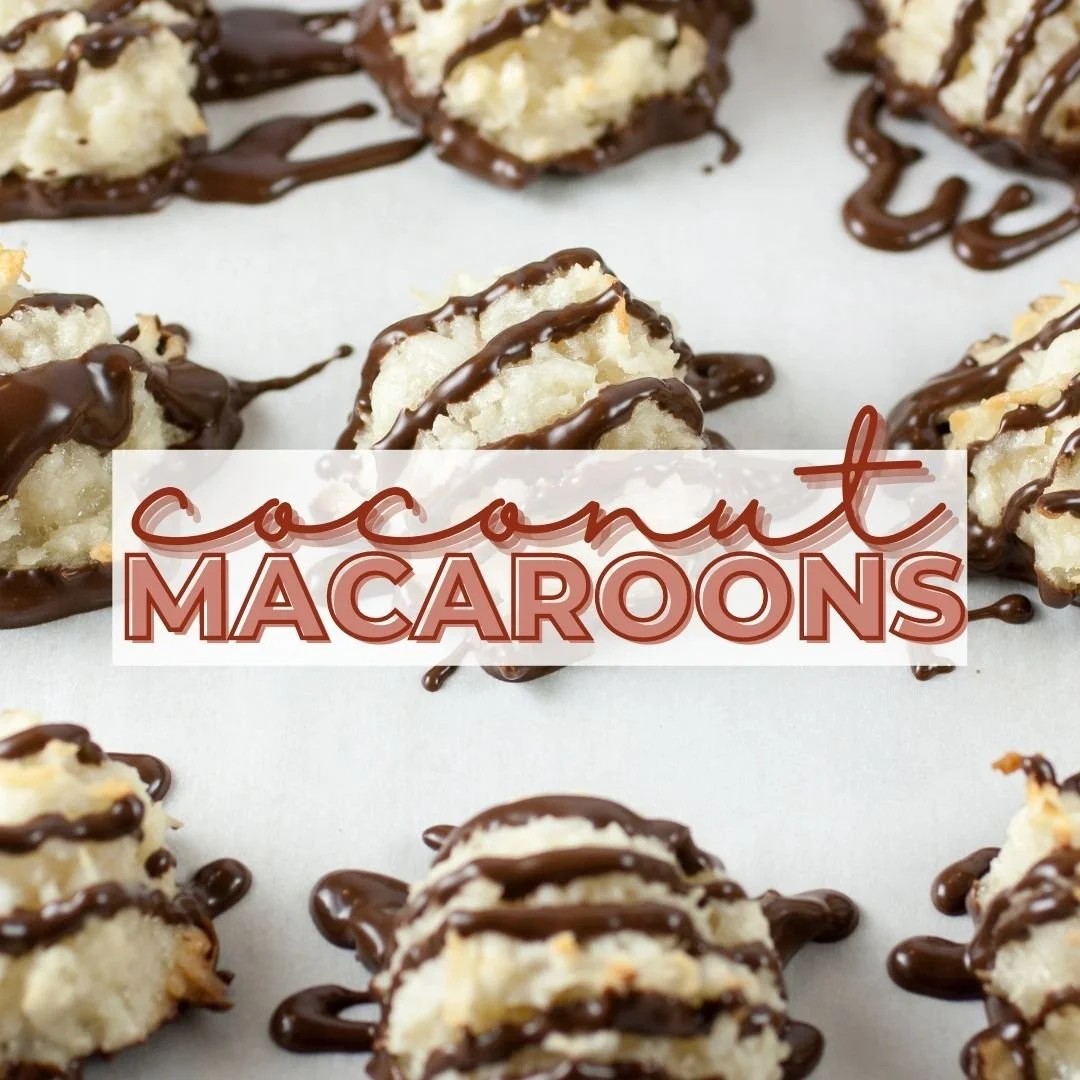
Coconut Macaroons

No matter how hard you try to stay on a healthy path, it can be nearly impossible to avoid sweet temptations. Luckily, we’ve learned you don’t have to and making your treats is a great way to stay in control of the sugar you take in through the holidays!

Made with whey protein and shredded coconut, these Coconut Macaroons are naturally low in sugar and satisfy your sweet tooth without sacrificing your waistline.

Servings 5 servings

INGREDIENTS
2 large egg whites

2 Tbsp. whey protein (We suggest Vanilla or Chocolate Shakeology!)

⅔ cup unsweetened shredded coconut

2 Tbsp. dark chocolate morsels

INSTRUCTIONS
Preheat the oven to 325° F.

Place egg whites in a clean medium mixing bowl; beat until stiff peaks are formed.

Gently fold in whey protein and shredded coconut. Drop by rounded Tbsp. onto a prepared baking sheet.

Bake for 13 to 15 minutes or until browned; cool.

Melt chocolate in a small microwavable bowl for 30 seconds at 50% heat. Stir and repeat until nibs melt.

Drizzle melted chocolate over cooled macaroons.

Container Equivalents: ½ Yellow, 1 Orange
2B Mindset Plate It! Enjoy as an occasional treat. Be sure to track it.

Mint Chocolate Chip Ice Cream

26. August 26 - Thursday.jpg

This homemade Mint Chocolate Chip Ice Cream gets the green color from a top-secret ingredient

(ok, I’m going to let you in on it). It’s a healthy treat and a great way to get some greens in 😉

This recipe makes 2 servings.

Ingredients
- 1 medium banana, cut into chunks
- ¼ cup canned lite coconut milk
- ¾ cup fresh spinach
- ½ tsp pure vanilla extract
- ¼ tsp pure peppermint extract
- ¼ cup mini chocolate chips

Instructions

1. Place the banana in a plastic bag and freeze for 4 hours (or until it’s completely frozen).

2. Place coconut milk and spinach in the blender; cover and blend until smooth.

3. Add the frozen banana and extracts. Blend until smooth.

4. Add chocolate chips and mix well with a spoon or spatula.

5. Pour into a freezer-safe container and freeze until set.

Portion Fix Containers: ½ Green, 1 Yellow, 1 Purple, ½ Blue
2B Mindset Plate It: Enjoy as an occasional treat; be sure to track.

No-Bake Blueberry Pie Bars

6. July 6 - Tuesday.jpg

I’m so excited to share with you some seriously delicious recipes that you can whip up for all of your summer outings. Hitting the beach? Picnic in the park? Mountain hike? You know I got you!

Ok, and I know your first on-the-go snack thought probably isn’t pie… but these No-Bake Blueberry Pie Bars are the perfect delicious treat to bring along to any adventure 😍

Ingredients

- Parchment paper

- 2 scoops Vanilla Shakeology (whey or plant-based)

- ½ cup almond flour

- ½ cup oat flour

- ¼ cup all-natural almond butter

- ⅓ cup unsweetened almond milk

- 2 tbsp pure maple syrup

- 1 tsp pure vanilla extract

- ½ cup freeze-dried blueberries

Instructions

1. Line a large baking sheet with parchment paper and set aside.

2. Add Shakeology, almond flour, oat flour, almond butter, almond milk, maple syrup, and extract to a large mixing bowl; stir until cookie-dough consistency is reached.

3. Add blueberries and gently fold to incorporate.

4. Press dough mixture into the prepared sheet, about ½-inch thick. Refrigerate for at least 2 hours.

5. Cut into 12 equal slices. Store in the fridge in an airtight container for up to 4 days or freeze for up to 2 weeks.

Portion Fix Containers: ½ Yellow, 1½ tsp.
2B Mindset Plate It: Enjoy as an occasional treat. Be sure to track it. 


Cauliflower Ice Cream - it's trendy and it's worth sticking around for!

9. March 9 - Tuesday.jpg

I mean, let’s be real… what can’t cauliflower do at this point? And just like this unassuming vegetable, I want you to remember - you can be anything you want to be.

You’ve seen cauliflower become pizza, nachos, rice… and we’re transforming it today into ice cream 🍨 And let me be clear - if you want real ice cream, you should eat real ice cream! Depriving yourself of the foods you love won’t makeover your mindset; it will just make you miserable. But this recipe IS a fun way to transform a vegetable into a tasty snack, especially if you need to get some extra veggies into the family.

So, will they be able to guess that their dessert is actually made from riced cauliflower?! Let’s find out 🤣

Ingredients

- 2 cups riced cauliflower
- 1 cup dry-roasted cashews, soaked
- ½ cup canned coconut milk
- ¼ cup + 1 tsp pure maple syrup
- ¼ cup unsweetened coconut milk beverage
- 1 tbsp + 1 tsp melted coconut oil
- 2 ½ tsp pure vanilla extract
- ¼ tsp sea salt

Instructions

1. To soak cashews, cover with room temperature water + soak overnight, or cover with boiling water and soak for at least 2 hours. Drain and rinse.

2. Place a pot with water over high heat. Boil cauliflower for 5 minutes; strain through a fine mesh strainer and then rinse with cold water until cool enough to handle. Wring out the excess water using a cheesecloth or a clean kitchen towel.

3. Place the cauliflower, soaked cashews, coconut milk, maple syrup, coconut milk beverage, coconut oil, vanilla, and salt in a blender. Cover and blend until smooth.

4. Pour the cauliflower mixture into an airtight container and freeze for 4 hours or until solid. Remove from the freezer 20-30 minutes before serving to let soften before scooping.

5. Store frozen in an airtight container for up to 5 days. If you have an ice cream machine, you can place the mixture in and freeze on a soft-serve setting.

This recipe makes 8 servings (½ cup each).

Portion Fix Containers: ½ Green, 1 Blue, ½ tsp

2B Mindset Plate It: A veggie + accessory snacktional.